How to Install Fast Connectors for Fiber Optics

Fiber optics technology transforms communication by offering high-speed data transmission. The global fiber optics market reached US$ 12.6 billion in 2023 and is projected to grow significantly. This growth reflects the increasing demand for fast and reliable internet connectivity. Fast connectors play a crucial role in this expansion. These components ensure quick and efficient connections, enhancing overall network performance. The installation of a fast connector optimizes fiber optic systems, making them indispensable in modern telecommunications.
Understanding Fast Connectors
What are Fast Connectors?
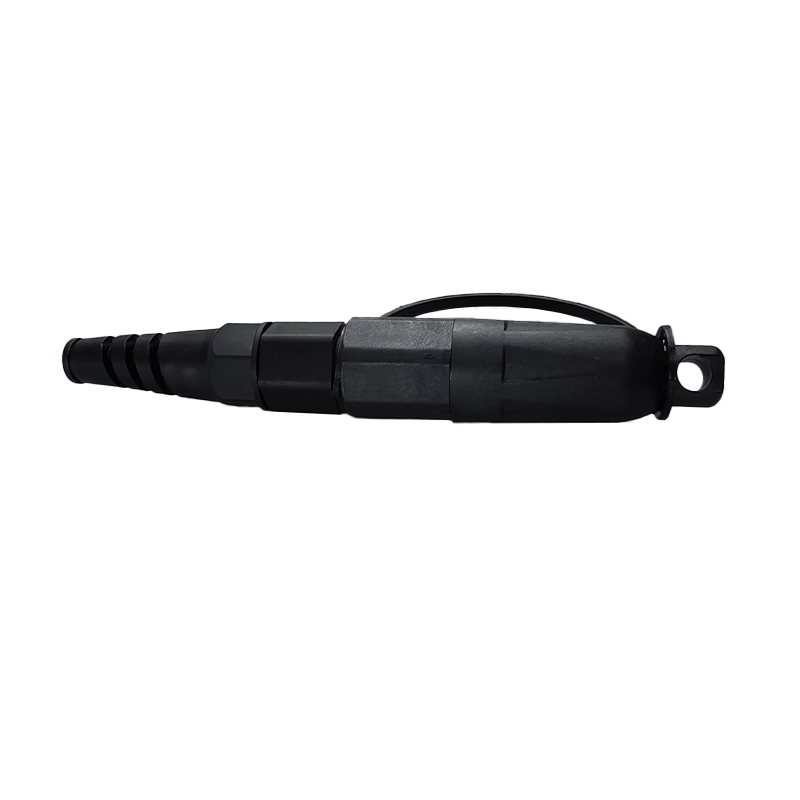
Definition and purpose
Fast connectors serve as essential components in fiber optic systems. These connectors allow quick and efficient connections between fiber optic cables. The primary purpose of a fast connector is to ensure a stable and reliable link. This stability enhances the overall performance of the network. Fast connectors eliminate the need for time-consuming splicing methods. Users can achieve high-quality connections with minimal effort.
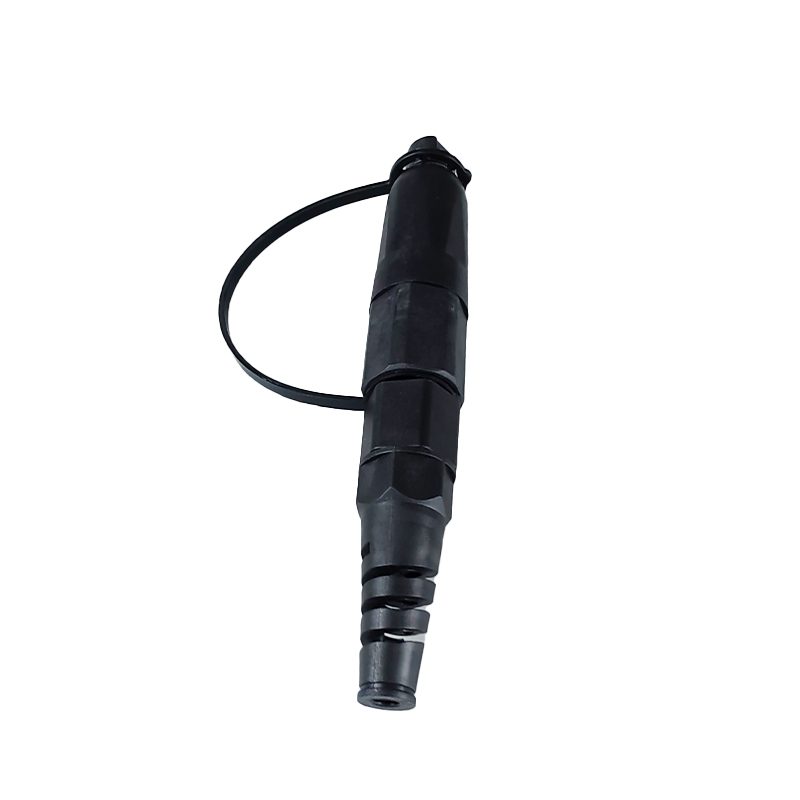
Types of fast connectors available
Several types of fast connectors exist in the market. Each type caters to specific needs and applications. SC connectors offer a simple push-pull mechanism. This feature makes SC connectors easy to use in various settings. LC connectors provide a smaller form factor. This compact design suits high-density applications. ST connectors utilize a bayonet-style coupling. This design ensures secure connections in environments requiring durability. Users must select the appropriate fast connector type based on their specific requirements.
Advantages of Using Fast Connectors
Time efficiency
Fast connectors significantly reduce installation time. Users can quickly connect fiber optic cables without extensive preparation. The cleave and crimp method streamlines the process. This method allows users to complete installations swiftly. Reduced installation time translates to increased productivity.
Cost-effectiveness
Fast connectors offer a cost-effective solution for fiber optic installations. Users save money by avoiding expensive splicing equipment. The elimination of epoxy injection further reduces costs. Fast connectors require minimal tools, decreasing overall expenses. Cost savings make fast connectors an attractive choice for many users.
Ease of use
Fast connectors provide ease of use for both beginners and professionals. The straightforward design simplifies the installation process. Users can achieve reliable connections without specialized training. Factory pre-polished connectors enhance user-friendliness. These connectors ensure consistent quality with minimal effort. Fast connectors empower users to complete installations confidently.
Preparing for Installation
Tools and Materials Needed
List of essential tools
Installing fast connectors for fiber optics requires specific tools. A fiber optic stripper is necessary to remove the outer jacket of the cable. A fiber cleaver ensures a clean cut on the fiber end. A visual fault locator helps in testing the connection. A crimping tool secures the connector in place. A lint-free wipe cleans the fiber before installation.
Recommended materials
Certain materials enhance the installation process. Isopropyl alcohol cleans the fiber effectively. Pre-polished connectors reduce installation time. Protective sleeves safeguard the fiber during handling. A fiber optic cleaning kit maintains the cleanliness of the work area. A fiber optic inspection microscope checks the quality of the connection.
Safety Precautions
Handling fiber optic cables
Handling fiber optic cables requires care. Avoid bending the cables excessively. Excessive bending can damage the fiber inside. Keep the cables away from sharp objects. Sharp objects can cause cuts or abrasions. Use a cable management system to organize the cables properly.
Personal protective equipment
Personal protective equipment ensures safety during installation. Safety glasses protect the eyes from fiber shards. Gloves prevent cuts and abrasions on the hands. A dust mask reduces inhalation of fiber particles. A lab coat keeps clothing free from contaminants. Proper footwear provides stability and prevents slips.
Step-by-Step Installation Guide
Preparing the Fiber Optic Cable
Stripping the cable
Begin by stripping the outer jacket of the fiber optic cable. Use a fiber optic stripper for this task. Ensure a steady hand to avoid damaging the inner core. Place the cable in the stripper's notch and apply gentle pressure. Rotate the stripper around the cable to remove the jacket. Inspect the exposed fiber for any signs of damage.
Cleaning the fiber
Cleaning the fiber is crucial for optimal performance. Use a lint-free wipe and isopropyl alcohol. Gently clean the exposed fiber to remove any contaminants. Hold the fiber at an angle to prevent scratches. Allow the fiber to dry completely before proceeding. Proper cleaning ensures a strong connection with the fast connector.
Attaching the Fast Connector
Inserting the fiber into the fast connector
Insert the cleaned fiber into the fast connector. Align the fiber with the connector's guide. Push the fiber gently until it reaches the end. Ensure the fiber does not bend or twist during insertion. A proper fit prevents signal loss and enhances performance.
Securing the connection
Secure the connection using the fast connector's locking mechanism. Engage the crimping tool to lock the fiber in place. Apply consistent pressure to ensure a tight fit. Check the connection for stability by gently tugging on the cable. A secure connection guarantees reliable data transmission.
Testing the Connection
Using a visual fault locator
Testing the connection is essential for ensuring quality. Use a visual fault locator to check for faults. Connect the locator to the fast connector. Observe the light emitted from the other end. A continuous light indicates a good connection. Flickering or no light suggests a problem.
Ensuring signal integrity
Ensure signal integrity by conducting further tests. Use an optical power meter to measure signal strength. Compare the readings with standard values. Consistent readings confirm a successful installation. Address any discrepancies promptly to maintain network performance.
Troubleshooting Common Issues
Poor Connection Quality
Identifying the problem
Poor connection quality often results from improper installation of the fast connector. Users may notice signal loss or intermittent connectivity. Check the alignment of the fiber within the fast connector. Misalignment can cause poor performance. Inspect the fiber for any dirt or debris. Contaminants on the fiber surface can degrade the connection quality. Use a visual fault locator to identify any breaks or faults in the fiber optic cable.
Solutions and fixes
To fix poor connection quality, start by realigning the fiber within the fast connector. Ensure that the fiber is straight and properly seated. Clean the fiber using a lint-free wipe and isopropyl alcohol. Remove all contaminants before reinserting the fiber into the fast connector. Tighten the locking mechanism of the fast connector to secure the fiber in place. Test the connection again with a visual fault locator to confirm improvements.
Connector Damage
Causes of damage
Connector damage can occur due to mishandling or environmental factors. Excessive force during installation can crack the fast connector. Exposure to moisture or dust can also damage the connector. In remote installations, such as those in the Andes Mountains, challenging terrains can increase the risk of damage. The AFL SkyWrap case study highlights the importance of careful handling in such environments.
Preventive measures
Prevent connector damage by handling the fast connector with care. Avoid applying excessive force during installation. Store connectors in a clean, dry environment to prevent exposure to moisture and dust. Use protective sleeves to shield connectors during transportation. In challenging terrains, like the Andes Mountains, ensure that all equipment is securely packed and handled. Regular inspections and maintenance can also help in identifying potential issues early.
Installing fast connectors for fiber optics involves a straightforward process. Follow the steps of stripping, cleaning, and securing the connection. Testing ensures optimal performance. Successful installation requires attention to detail and practice. Use high-quality materials and tools for best results.
Erwin Gelderblom and Marcel Buijs from the Netherlands emphasize the importance of quick reactions and friendly assistance in fiber optic installations.
StellarNet, Inc. highlights the ease of purchasing and excellent customer service, which enhances the installation experience.
Telenco appreciates the professionalism and dedication that ensure quality work in fiber optics.
Practice regularly to refine your skills and achieve reliable connections.
See Also
Attaining Optimal Performance with Affordable Fiber Optic Connections
Advantages of Weatherproof FastConnect Fiber Field Connectors
Comparison of Quick Fiber Optic Connectors
Discovering Advantages of 960 Core Fiber Optic Splice Enclosure
Explore the infinite possibilities of the future of telecommunications